


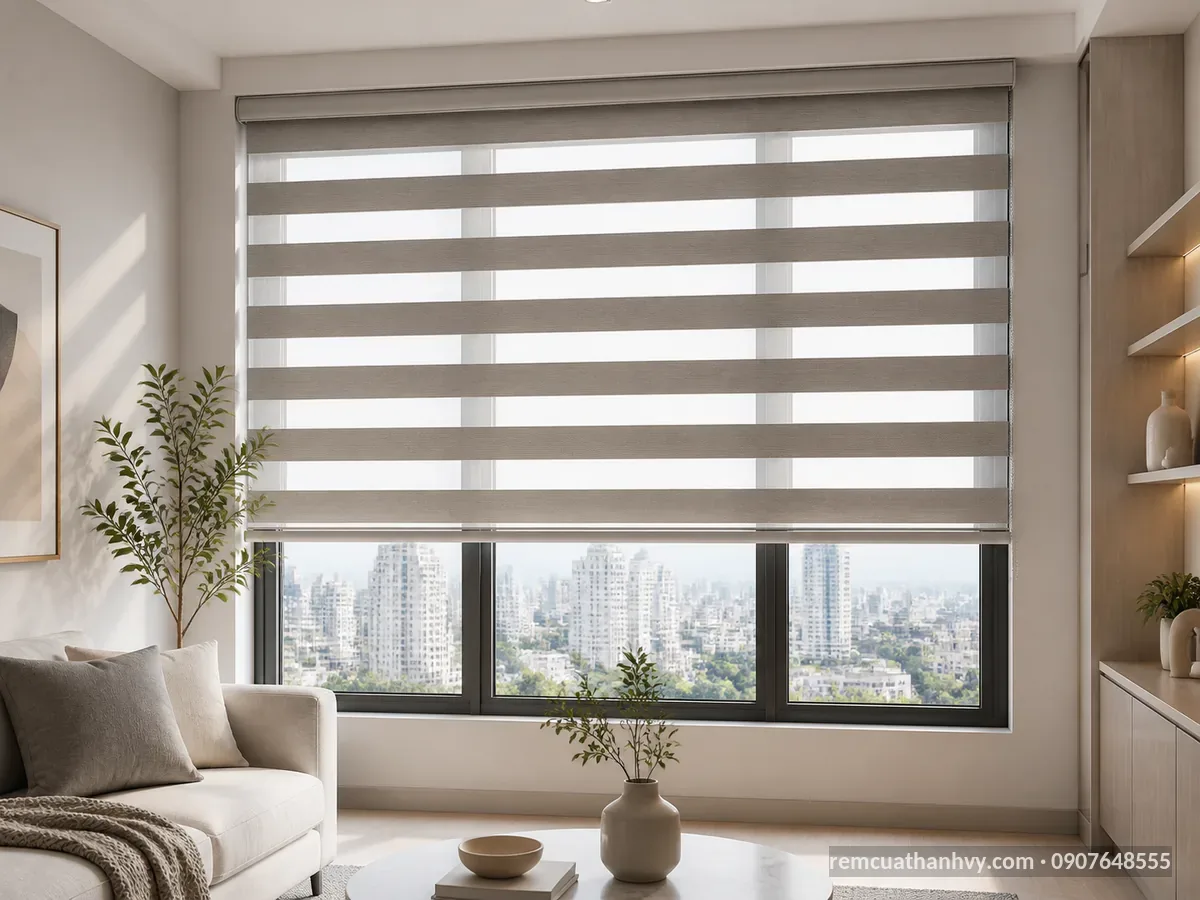
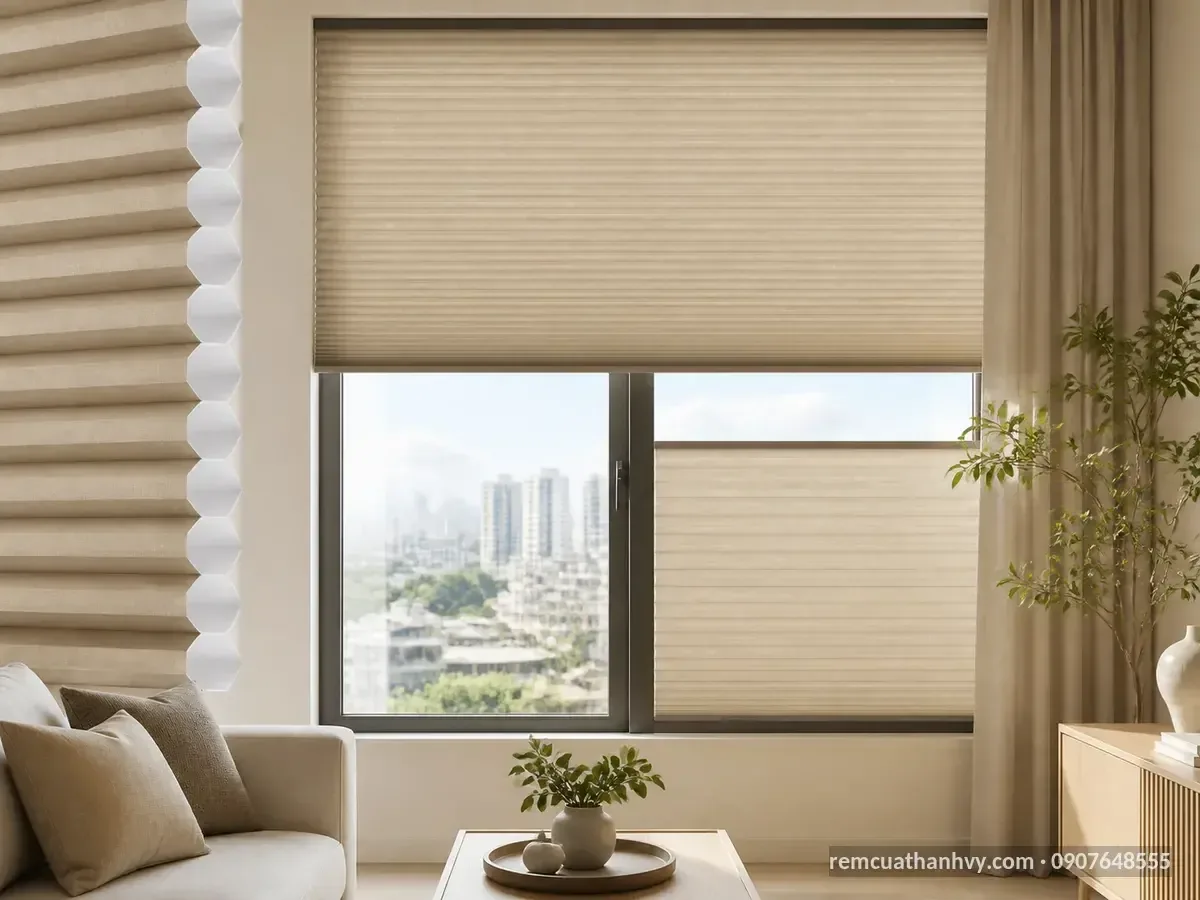
School and Preschool Window Treatments: Safe, Easy to Clean, Glare-Reducing
What criteria should school window coverings meet for safety, easy cleaning, and glare reduction?
School window coverings should be selected based on three requirements that can be checked on-site: reducing glare on boards and screens, limiting heat absorption around windows, and allowing convenient cleaning without creating hazardous features for students. During the survey, the school needs to assess the direction of sunlight, window dimensions, the positions of desks, projectors, and interactive displays, and how frequently the coverings will be opened and closed. Suitable window coverings not only block sunlight but also maintain consistent visibility, reduce glare, and protect teaching equipment.
1. Safety first: do not let pull cords become a hazard
In classrooms and preschool rooms, pull cords, hanging beads, plastic hooks, curtain rods, and connectors must be positioned out of young children’s reach or secured close to the wall. Control cords should not hang beside walkways, play areas, or emergency exits. Roller shades with enclosed bottom bars, sturdy roller mechanisms, and brackets screwed into the appropriate mounting surface help reduce the risk of shades coming loose when pulled hard. For vertical blinds, check the vane connecting chains, carriers, and aluminum track to prevent jamming or parts falling off during use.
Before finalizing a model, request a hands-on inspection of the fabric surface, seams, cut edges, bottom bar, and accessories. The fabric should not have sharp edges, metal burrs, or an excessively strong plastic odor in an enclosed room. If using fabric curtains, the rod must support the weight when the curtains are pulled multiple times each day; curtain rings and end caps should be closed, with no sharp screws exposed. For preschool areas in particular, prioritize simple designs with few detachable parts, and do not place curtains close to beds, toy shelves, or stair railings.
2. Reduce glare according to window position, rather than choosing by color alone
Glare reduction depends on the direction of sunlight, the coating, and how fully the covering covers the window opening, not just whether its color is blue or light. East-facing windows often cause glare in the morning; west-facing windows receive intense solar radiation in the afternoon. In classrooms with projectors or interactive displays, coverings need to extend low enough and beyond the edges of the glass so that no strips of light enter along the sides. When measuring, record the glass width, the available wall width for coverage, and the distance from the edge of the covering to the equipment separately.
100% Polyester fabric with a plastic or Acrylic coating is a material commonly used for school window coverings because its surface is stable, it offers a choice of light-blocking levels, and it is easier to wipe clean than loosely woven fabric. Some models are approximately 0,5 mm thick; this specification should be verified using an actual sample or material data sheet, rather than inferred from the product name. For rooms used to show films, test the coverings when sunlight is actually present: close them fully, turn on the projector, and observe reflected light on the board, screen, and front-row desktops.
Do not assess glare reduction by standing right next to the window. Sit in the front row, the middle of the classroom, and the back to check three viewing angles. If white streaks still appear on the board, you may need to increase coverage on both sides, add a mesh layer, or change the orientation of the vanes. With vertical blinds, rotating the vanes according to the angle of sunlight helps regulate light while allowing ventilation; roller shades are quicker to raise and lower, but the right light-blocking level must be selected for each room.
3. Heat insulation and protection for teaching equipment
Large glass panes often cause temperatures near windows to rise quickly, making it harder for students seated beside them to concentrate and requiring air conditioners to run longer. Coverings with a light-blocking coating help reduce the amount of direct solar radiation entering the room, but their effectiveness also depends on gaps, how tightly the edges are covered, and the distance between the covering and the glass. During inspection, assess the perceived heat at desks near the window before and after closing the coverings within the same time period; also check the heat reaching projectors, interactive displays, and equipment cabinets.
Do not close coverings over emergency exits, ventilation openings, or areas where a view of the schoolyard is needed. If the classroom has casement windows, leave enough operating clearance so that the sashes do not hit the bottom bar, roller housing, or blind track. Measurement drawings should mark handles, electrical outlets, fire detectors, cameras, ceiling fans, and service boxes. These points of overlap determine bracket placement, curtain rod length, and day-to-day operation.
For further information, please contact Thanh Vy Curtains
We provide free consultation and on-site measuring at your home.
4. Easy cleaning within the school’s operating schedule
School window coverings must withstand chalk dust, road dust, moisture, and constant opening and closing. Polyester surfaces with a plastic or Acrylic coating are generally more convenient for routine cleaning: use a dry microfiber cloth to remove dust, then wipe with a damp cloth and a neutral cleaning solution according to the material instructions. Do not use stiff brushes, strong bleach, or high-pressure water jets without first checking the coating’s resistance. After wiping, leave the coverings fully extended and well ventilated so that the fabric edges, bottom bar, and roller housing dry before retracting them.
The cleaning schedule should be divided by area: classrooms near roads can be checked for dust weekly; infrequently used rooms can be checked monthly; auditoriums need cleaning before large gatherings. The person in charge should record the cleaning date, any parts removed, remaining stains, and the condition of pull cords. If the coverings develop a musty smell, mold spots, loose seams, or jammed carriers, address the issue promptly rather than continuing to pull hard and damaging the rod.
5. Quick inspection checklist before ordering samples
- Measure the direction of sunlight, glass width, installation height, and coverage on both sides.
- Identify the positions of boards, projectors, interactive displays, desks, and emergency exits.
- Check the material, coating, thickness, bottom bar, brackets, and control mechanism.
- Test pulling, rolling, and rotating the vanes for at least a few cycles at the actual window where they will be installed.
- Ask for clear instructions on cleaning, permitted cleaning solutions, and replacement parts in case of damage.
- Request color samples to view in actual lighting; do not decide based solely on images on a screen.
To select the right school window coverings for each block of rooms, the school can send a preliminary window count, photos showing the direction of sunlight, and glare-reduction requirements. An on-site survey will help determine the type of covering, light-blocking level, accessory placement, and suitable cleaning plan before a cost estimate is prepared.
Choosing suitable window treatments and materials for classrooms, preschool rooms, and functional areas
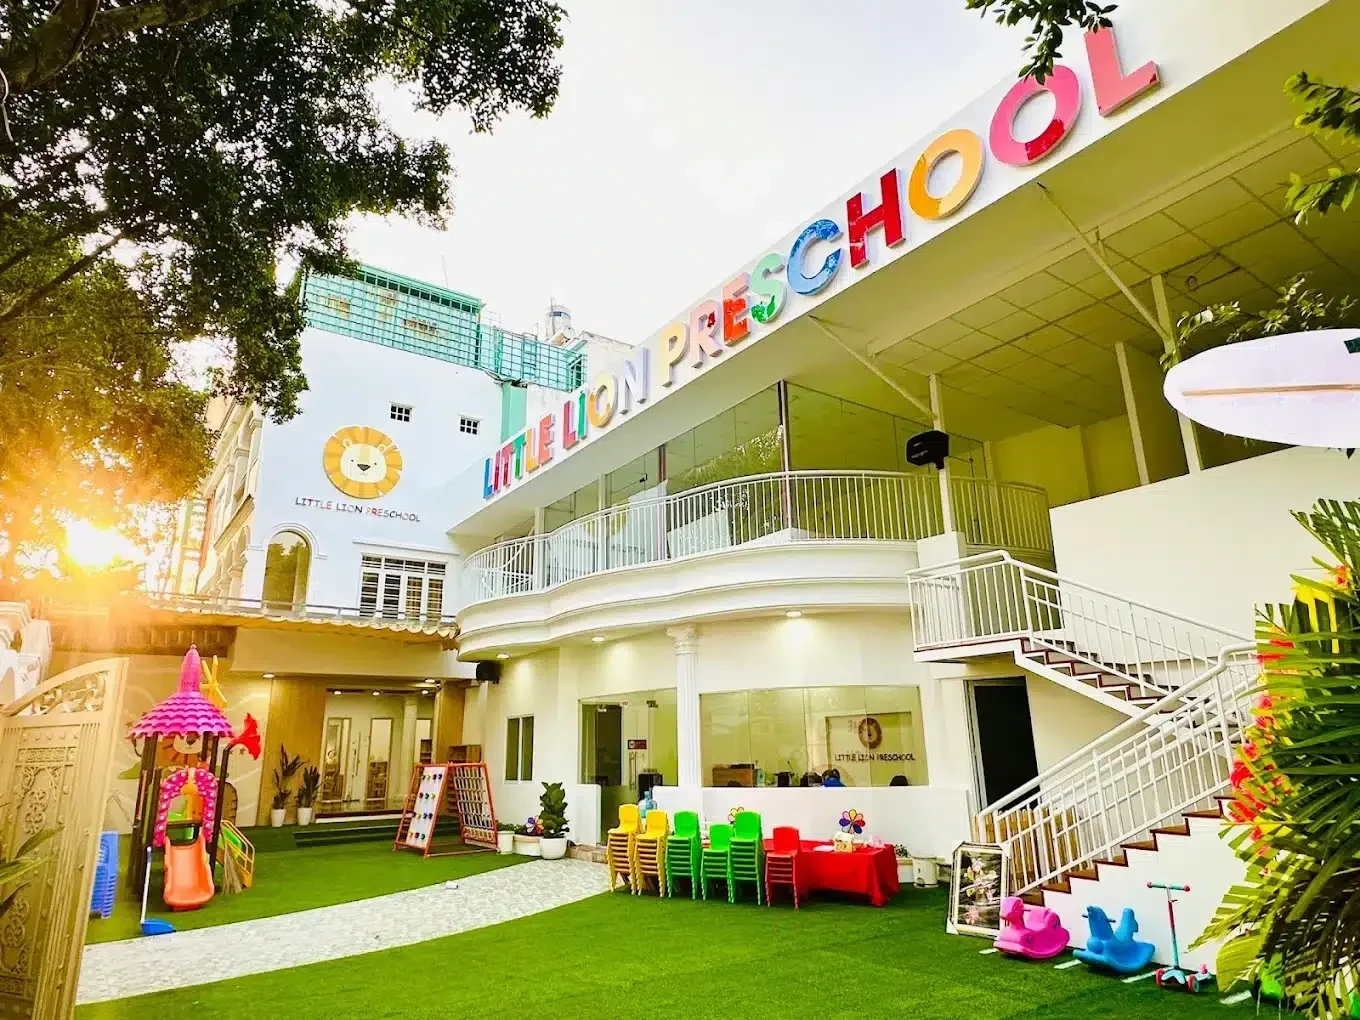
You should not choose a single school window treatment design for the entire building. Classrooms need light control for viewing the board and using projectors; preschool rooms need safe materials with few parts that can snag; auditoriums need large window treatments that operate reliably; and offices prioritize a neat appearance. A practical approach is to create a matrix based on sun exposure, window dimensions, opening and closing frequency, dust accumulation, cleaning requirements, and budget before finalizing a design.
| Area | Suitable window treatments | Preferred materials | Points to check |
|---|---|---|---|
| Classrooms with projectors | Light-blocking roller blinds or vertical blinds | Plastic/Acrylic-coated polyester, surfaces that resist dust buildup | Light-blocking coverage, pull operation, gaps on either side of the frame |
| Preschool rooms | Light-colored roller blinds, short curtains, or zebra blinds with neatly secured cords | Easy-to-wipe polyester fabric, sturdy stitching, hardware without sharp edges | Pull cords out of reach, appropriate patterns, no folds that can snag |
| Auditoriums | Double-layer curtains or large vertical blinds | Thick polyester fabric, light-filtering sheers, load-bearing aluminum tracks | Wall coverage width, track load capacity, stacking direction |
| Teachers’ rooms, offices | Roller blinds, zebra blinds, or vertical blinds | Acrylic-coated polyester, neutral colors, powder-coated aluminum tracks | Desk area, window opening angle, flexibility in light adjustment |
Classrooms: prioritize compact blinds that block light where needed
For windows approximately 1,2–2,4 m wide, roller blinds are often easy to position because the fabric sits close to the wall or inside the window opening. When projectors are used, choose plastic- or Acrylic-coated polyester fabric with a light-blocking backing to reduce glare on the screen. Blinds can be divided into two or three units corresponding to individual window sashes rather than using one overly wide panel; this reduces pulling effort, makes replacement easier, and limits roller tube distortion.
Before ordering school window treatments for classrooms, measure the glass width, the height from the top of the frame to the sill, and the clearance needed for the handle. For outside mounts, allow enough overlap on each side to block light at the edges; for inside mounts, check whether the roller housing touches the window sash. For rows of consecutive windows, technicians should label each opening by room, sun exposure, and sill height to avoid installing the wrong sizes.
Preschool rooms: soft materials, easy-to-wipe surfaces, and compact hardware
Preschool rooms experience more frequent hand contact and cleaning than regular classrooms. Smooth polyester or coated fabric that can be wiped with a damp cloth is more suitable than materials with raised fibers, tassels, decorative beads, or dense pleats. Animal patterns, large geometric shapes, or pastel colors can create a welcoming atmosphere, but pattern density should remain moderate so windows do not become visually distracting.
In areas where children frequently play, avoid leaving pull cords hanging freely within reach. Options include a chain control positioned toward the teacher’s side, a pull handle with a retaining latch, or a roller mechanism secured close to the wall. Fabric edges should be neatly hemmed, bottom rails should have no sharp edges, and brackets should be firmly attached to the wall without obstructing window opening. During the site survey, note the locations of electrical outlets, toy shelves, low tables, and physical activity areas to choose a length that will not interfere with equipment.
Functional areas: choose based on usage demands and layout
Auditoriums, meeting rooms, and stages often have tall windows, wide openings, or continuous expanses of glass. Thick polyester curtains combined with sheers allow adjustment for different needs: sheers are used for soft light, while the thick layer is used for presentations or events. For large curtain sets, calculate the number of hanging points, the aluminum track’s load capacity, roller positions, left or right stacking direction, and clearance from lights, speakers, and air conditioners.
Principals’ offices, teachers’ rooms, and counseling rooms are often well suited to roller blinds or zebra blinds because they save space around desks, filing cabinets, and inward-opening windows. Zebra blinds allow you to adjust the light-filtering bands without rolling up the entire blind; however, the pull mechanism, fabric flatness, and ease of cleaning each layer need to be checked. For floor-to-ceiling glass, consider handle length, plant pot locations, and exit routes before choosing full-length window treatments.
Choosing materials based on the usage environment
Polyester is a popular choice for school window treatments thanks to its moderate weight, wide range of colors, and ease of fabrication to fit window dimensions. Plastic- or Acrylic-coated options can improve light blocking, help reduce radiant heat at the glass surface, and maintain a more stable surface. Some models are listed as approximately 0,5 mm thick; actual specifications should be checked against the fabric sample or technical data sheet rather than inferred solely from the product name.
Powder-coated aluminum tracks are suitable for environments requiring frequent opening and closing because they are lightweight, take up little space, and work with many window treatment styles. For curtains, check the heading tape, grommets or hanging hooks, side stitching, lining, and bottom rail. For roller blinds, inspect the roller tube, mounting brackets, bottom rail, pull cord, and braking mechanism. For vertical blinds, check the slats, carriers, tilt cord, and whether individual slats can be replaced when damaged.
Decision matrix before sample approval
The school can ask the installer to prepare a sample chart including fabric codes, colors, light transmission, fabric width, cleaning methods, hardware types, and intended locations. Each room should have its own row, with a window photo, overall dimensions, sun exposure, and notes on equipment below the window. This approach helps distinguish classroom window treatments, school window treatments for preschool rooms, and auditorium designs, rather than approving a single design and then having to make changes during installation.
Actual costs also depend on fabric type, dimensions, number of units, tracks, installation locations, and shipping volume. Therefore, request a quote that itemizes fabric, hardware, and installation labor separately.
Send a room list, photos showing sun exposure, and preliminary dimensions for advice on suitable window treatment types, materials, and unit divisions for each area.
Know the cost before you decide
Send estimated dimensions and a few photos of the space, and Thanh Vy Curtains will prepare a quote for exactly the items you need.
Request a quote Call 0985 615 577 Message on ZaloRequest a sample chart with fabric codes, light-blocking levels, hardware construction, and prices per square meter before the school approves the plan.
Comparing roller blinds, vertical blinds, curtains, and zebra blinds for schools
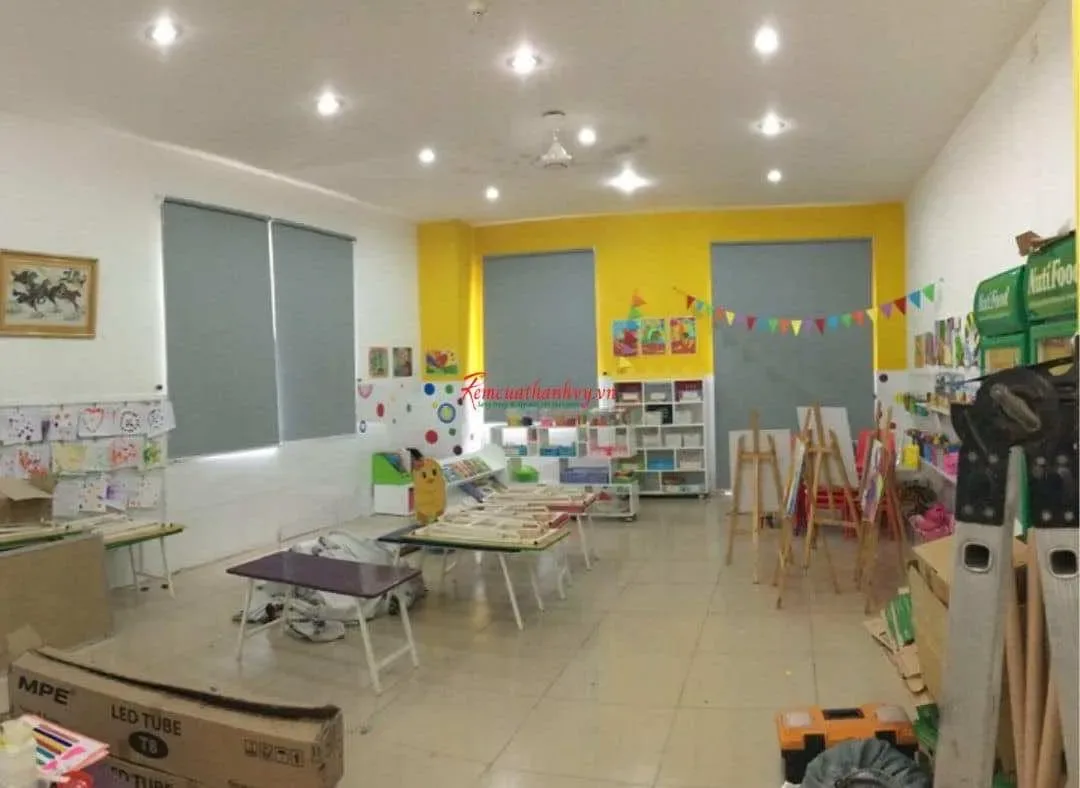
For school window treatments, roller blinds suit classrooms that need compact, easy-to-wipe coverings and quick light control; vertical blinds are suitable for wide glass windows; curtains offer advantages in auditoriums and meeting rooms by adding softness and helping reduce sound; and zebra blinds suit offices or reception areas that need flexible light adjustment. The decision should be based on sun exposure, window dimensions, cleaning frequency, furniture layout, and the budget for each room.
Quick Comparison of Four Window Covering Types
| Type | Strengths | Limitations to Consider in Advance | Suitable Areas |
|---|---|---|---|
| Roller shades | Compact, quick to operate, take up little space, easy-to-wipe surface | Large windows may require multiple units; thin fabric can let light through at the edges | Classrooms, computer labs, single windows or rows of glass panes |
| Vertical blinds | Cover wide glass windows, rotate slats to redirect light, draw to one side | Numerous slats and carriers need cleaning and can become misaligned if pulled forcefully | Classrooms with glass walls, meeting rooms, lobbies |
| Curtains | Create a warm feel, help reduce reverberation, can be made in two layers | Take up space, collect more dust, require regular washing or vacuuming | Auditoriums, stages, principal’s offices, meeting rooms |
| Zebra shades | Two layers with mesh and light-blocking bands offer flexible adjustment and a modern look | Rolling mechanism requires proper operation; harder to clean than smooth roller shade surfaces | Offices, counseling rooms, administrative areas |
Roller Shades: A Practical Choice for Classrooms
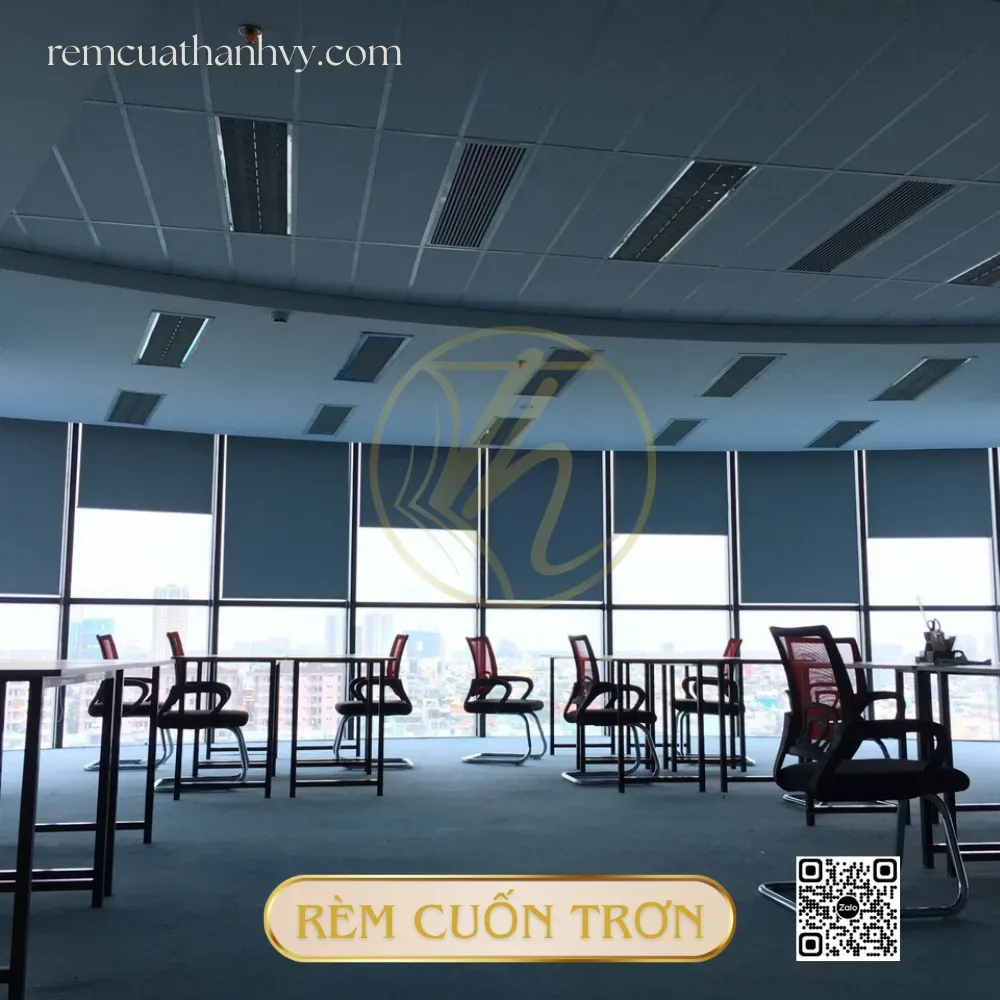
Roller shades use a single sheet of fabric rolled around an aluminum tube, operated by a bead chain or spring. When fully lowered, the fabric forms a barrier in front of the window; when rolled up, the shade fits neatly above the frame. This type suits classrooms with whiteboards, projectors, or interactive displays because teachers can adjust light coverage in seconds. For wide windows, separate units are preferable to a single overly heavy shade.
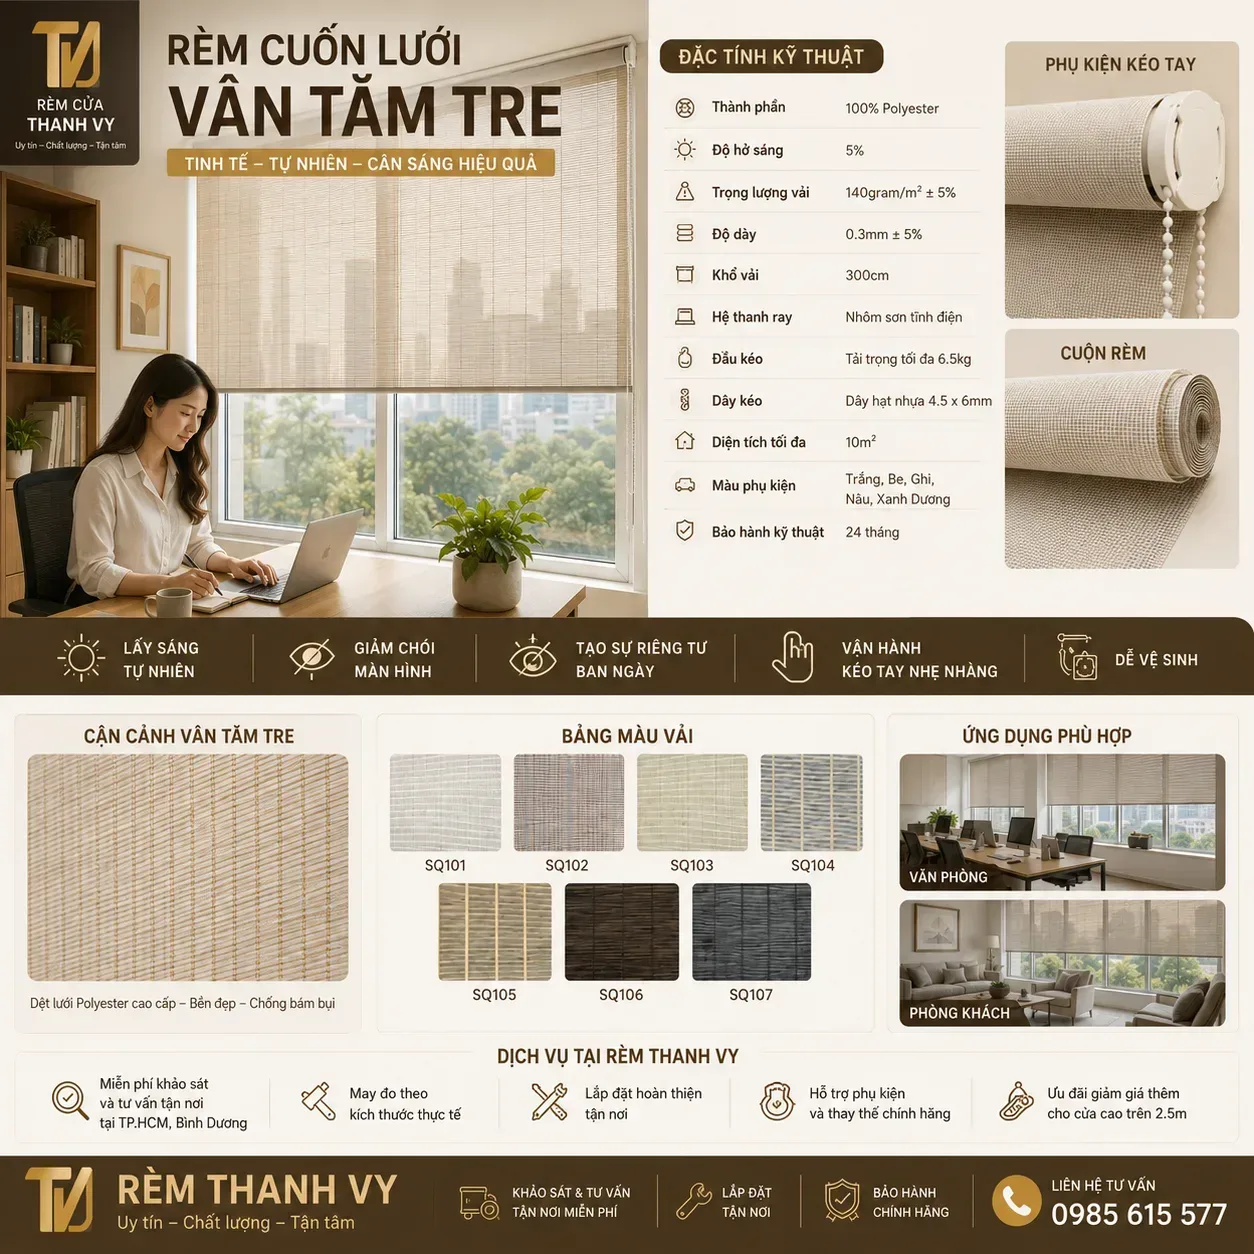
Common materials include 100% polyester with a plastic or Acrylic coating. High-opacity options help reduce light shining directly onto the board while limiting heat passing through the glass. Some models are approximately 0,5 mm thick; when reviewing samples, the school should check the flatness of the fabric edges, color consistency, and how the coating responds to wiping with a damp cloth. Light-colored fabrics create an airier space but may require a high level of light blocking on west-facing windows.
Roller shades are easy to position close to window frames, without obstructing walkways or touching desks. However, light gaps on both sides can cause glare when sunlight enters at an angle. This can be addressed by increasing horizontal coverage, installing a sturdier bottom bar, or dividing the shades by individual window sashes. Pull cords should not hang down in areas used by young children; the control should be secured at the side, out of children’s direct reach.
Vertical Blinds: Optimized for Glass Walls and Large Windows
Vertical blinds consist of an aluminum track, carriers, hanging hooks, vertical fabric or plastic slats, and a rotation chain. Users can draw the entire set to the left or right, or rotate individual slats to direct light toward the ceiling, down to the floor, or away from screens. This mechanism is useful in classrooms with continuous rows of glass windows, where roller shades would require too many small units.
Common slat widths range from approximately 8,9 to 12,7 cm, depending on the product system. Narrow slats create a streamlined look, while wider slats reduce the number of joints across the same width. When measuring, clearly record the track length, the direction in which the slats stack, the pull control position, and clearance from cabinets, the teacher’s desk, or window handles. Powder-coated aluminum tracks should run smoothly, remain free of sagging across long spans, and have covers that are easy to remove for maintenance.
An advantage of vertical blinds is that individual dirty or damaged slats can be replaced without replacing the entire system. A disadvantage is that carriers and wheels can jam if dust accumulates; pulling at an angle before the slats are straight also increases strain on the cord. The school should instruct users to rotate the slats into the same plane before drawing them sideways, avoid yanking the cord, and never hang items on the slats.
Curtains: Suitable for Spaces That Need Softness and Reduced Reverberation
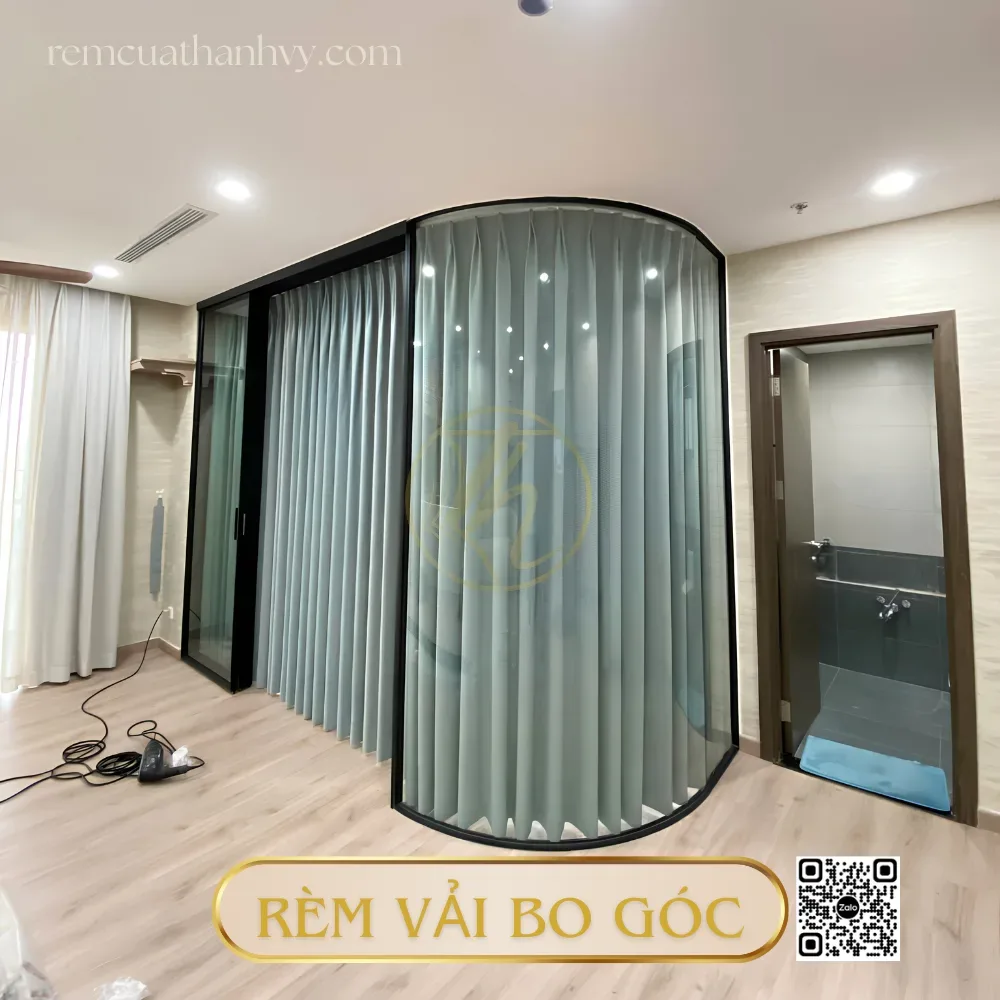
Curtains are typically made to size and hung on sliding tracks or round rods with rings. In auditoriums, meeting rooms, or principal’s offices, thick fabric makes the space feel less cold and helps absorb some of the sound reflected off glass surfaces. A two-layer option consists of an inner sheer or light-filtering fabric layer and an outer light-blocking layer, allowing daylight in while maintaining privacy.
When comparing quotes, do not look only at the price per square meter of fabric. Fabric allowances, fullness ratio, tiebacks, track end caps, mounting brackets, hooks, rings, and installation labor should be itemized separately. For example, for the same window width, curtains made with a fullness ratio of 2,0 will use more meters of fabric than those with a ratio of 1,5. The installer should clearly specify the finished dimensions, hem depth, pleat direction, and seam finishing method.
Curtains require a more realistic cleaning schedule than roller shades. The surface can be vacuumed with a soft brush attachment; for localized stains, test the cleaning solution in a hidden corner before wiping the entire area. In preschool classrooms, curtain hems should not touch the floor or form long cord loops near play areas. If used on a stage, check the distance from hot lights and select materials according to the supplied technical documentation, rather than making assumptions about fire resistance without supporting documents.
Zebra Shades: Flexible Light Control for Administrative Areas
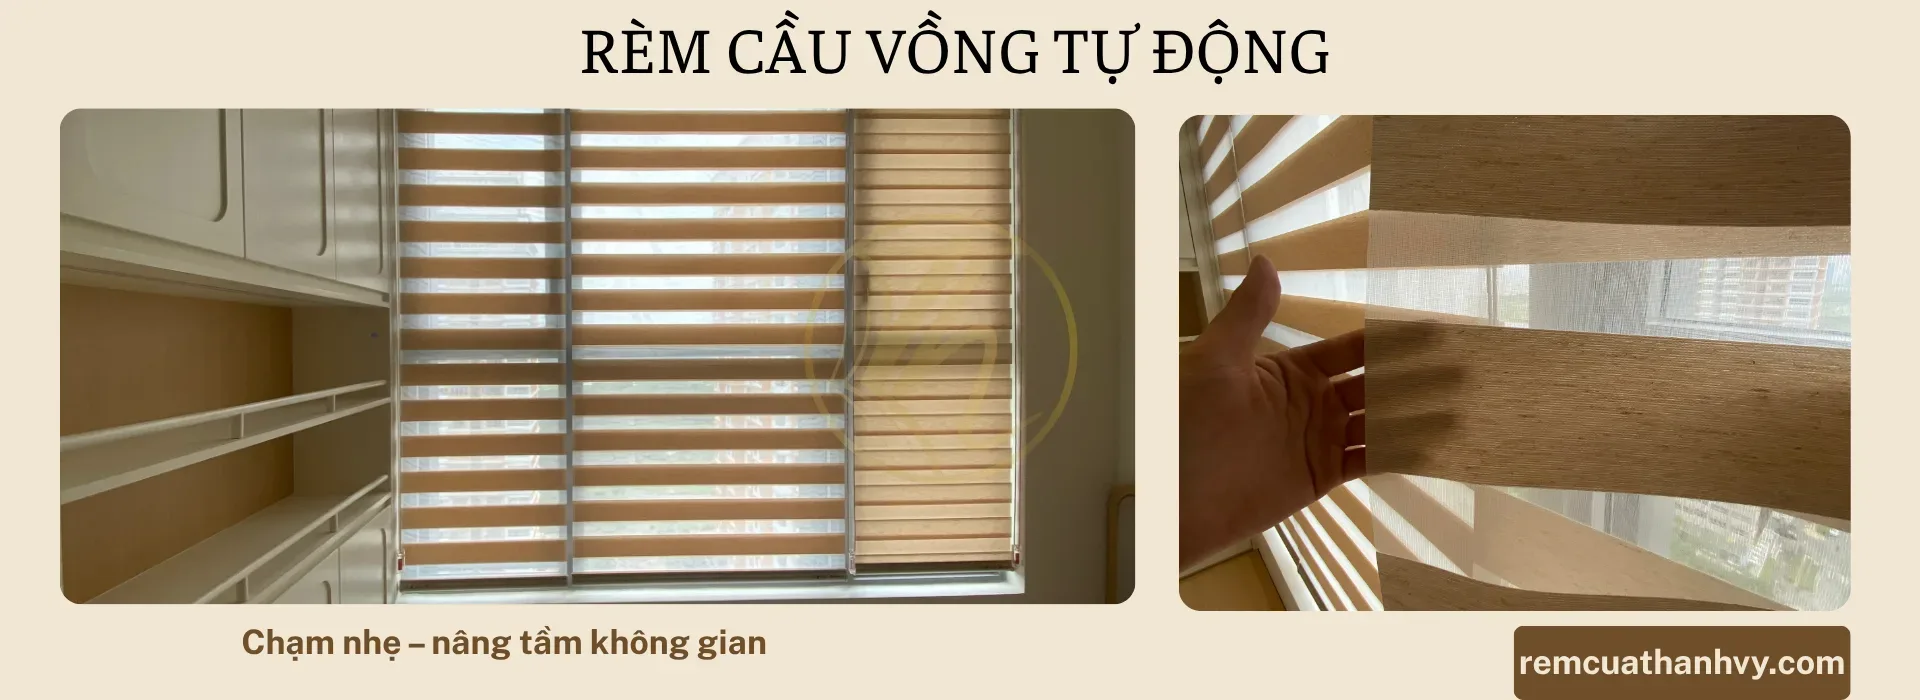
Zebra shades, also called dual-layer roller shades, consist of alternating solid fabric and mesh bands across two fabric layers. When the two solid bands overlap, light is restricted; when the mesh bands align, diffused light enters the room. This mechanism allows a transition from soft light to privacy without fully raising the shade, making it suitable for offices, counseling rooms, or parent reception areas.
This shade style creates a neat, modern look but requires precise alignment. The roller tube must be level, the bottom bar must not tilt, and the two fabric layers must move evenly across the entire width. When cleaning, use a soft cloth or a vacuum on low power; do not scrub the mesh bands forcefully, as this can deform their structure. The control cord should be neatly secured with a clip, especially in rooms that children frequently pass through.
Choose based on usage and budget
If cost and timelines are priorities for multiple identical classrooms, roller shades are usually the easiest to standardize. Vertical blinds may be more suitable when the full width spans a large glass wall, as they reduce the number of separate control units.
If an auditorium needs a formal appearance, double-layer curtains may be worth considering despite the greater amount of fabric, tracks, and sewing labor required. If an administrative office needs frequent lighting adjustments throughout the day, zebra shades offer more flexible operation than single-layer roller shades. Before making a final decision, create a table for each room listing its width, height, sun exposure, glass type, equipment inside, cleaning method, and the person who will operate the window coverings.
One team from drawings to installation
Thanh Vy Curtains surveys, designs and installs based on your actual site. Send us the dimensions and current condition, and we will advise the right solution.
Request a quote Call 0985 615 577 Message on Zalo| Situation | Preferred option | Items to check on-site |
|---|---|---|
| Morning glare affects the projector | High light-blocking roller shades or blinds with adjustable slats | Light gaps along the edges, sun angle, projection screen location |
| Glass wall longer than 5 m | Vertical blinds with divided tracks or multiple roller shade units | Track joints, stacking direction, door clearance |
| Auditorium with a stage | Custom curtains fitted to tracks, with a light-filtering layer if needed | Distance from lights, service enclosure dimensions, track load capacity |
| Office requiring occasional privacy | Zebra shades | Roller tube alignment, control cord, mesh stripe color |
To choose the right school window coverings, ask the supplier to bring actual samples for comparison under the light at the window rather than relying only on photos. Try pulling, rotating, and rolling a sample unit; check track noise, mounting bracket sturdiness, removal for cleaning, and whether accessories can be replaced. For projects in Ho Chi Minh City, you can send a room list along with photos showing sun exposure to receive a proposed unit layout, materials, and unit pricing for each area.
Before ordering school window coverings, record the following in the approval sheet: fabric code, polyester composition or coating, light-blocking level, finished dimensions, accessory colors, operating method, and warranty coverage. Some quotes list an estimated installation time of 3–7 days depending on quantity; the actual schedule still needs to be finalized based on site conditions, room handover schedules, and the scope of acceptance inspections.
Technical requirements for glare control, thermal insulation, cleaning, and operation of window coverings
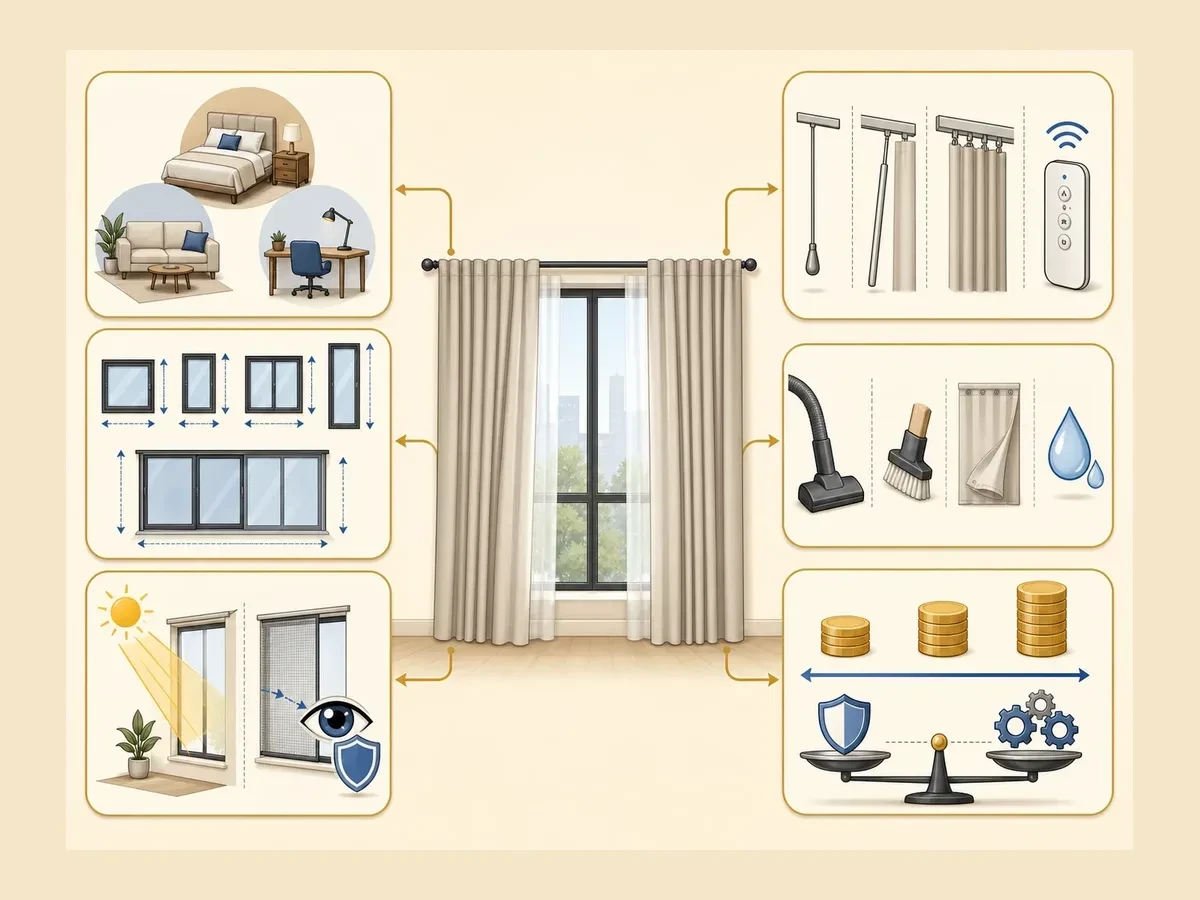
For school window coverings, technical specifications should be finalized with the aim of reducing glare where needed, limiting heat entering through windows, enabling quick cleaning, and ensuring safe daily operation. Schools should check fabric samples, light-blocking levels, overall dimensions, hanging hardware types, pull cords, and clearances before approving production. Suitable window coverings must help students see the board, projection screen, or interactive display without creating reflections, while avoiding obstructions in walkways.
Control glare based on sun exposure and teaching equipment
Do not choose the same light-blocking level for every room. West-facing windows often receive strong, angled sunlight in the afternoon; classrooms with projectors need fabric with greater light-blocking capacity than rooms that only use whiteboards. During the site survey, record window orientation, sill height, front-row desk locations, projector angle, and distance to the screen. Roller shades can use Acrylic-coated or plastic-coated fabric to reduce light transmission; a thickness specification of approximately 0,5 mm should be verified against actual samples and quotes.
For a quick check, technicians should test the window coverings in three positions: fully open, fully closed, and partially lowered. Observe from the teacher’s position, the two rows of desks nearest the windows, and the back of the classroom during strong sunlight. If substantial light leaks around the edges, increase the overlap on both sides or add a bottom rail. For vertical blinds, the slats must rotate far enough to direct light toward the ceiling rather than horizontally into people’s eyes. For zebra shades, test the position where the sheer stripes align when using a screen.
Thermal insulation and protection of classroom equipment
Window coverings do not replace insulating glass or window film, but they can reduce direct solar radiation on desks, walls, and equipment. Polyester fabric with a backing coating helps limit light transmission and reduce the sensation of heat near windows. When choosing school window coverings, also consider the outward-facing color, edge coverage, bottom rail, and distance between the covering and the glass. A unit that fully covers the window opening will be more effective than a short panel with gaps at the top or sides.
Projectors, interactive displays, speakers, and computers near windows need protection from sunlight during peak hours. Staff can schedule lowering the shades before afternoon classes, then reopen them when ventilation is needed. Do not force a shade when its bottom rail catches on a desk; prolonged uneven pulling can bend the roller shaft, dislodge a pulley, or twist the control cord. A minimum clearance between the window covering and an open window sash must also be maintained to prevent contact.
Materials and details to check before acceptance
Approved samples should clearly show the polyester composition, Acrylic or plastic coating, front, back, thickness, light-blocking level, and actual color under classroom lighting. Powder-coated aluminum hanging rails must be straight and free of sharp edges, screws must be fully tightened, and support brackets must be securely attached to the wall or ceiling. For vertical blinds, check the slat connector chains, pull cords, and carriers; for roller shades, check the roller tube, shaft, bottom rail, and brackets.
Small details that directly affect safety include cord ends, pull weights, hooks, wall anchors, and control cord placement. Cords should not hang into areas where young children could pull them or wrap them around their hands. In preschool rooms, prioritize compact pull mechanisms, secured cord ends, and no exposed sharp accessories. If using a motor, identify the switch location, power supply, emergency stopping method, and ability to operate manually during a power outage.
Cleaning procedures that do not damage the coating
Before wiping, staff should remove dust with a soft-bristled brush or a vacuum cleaner with a brush attachment on low suction. Roller shades and zebra shades should be wiped vertically with a well-wrung microfiber cloth; do not scrub with abrasive pads, use chlorine-based cleaners, or spray chemicals directly onto the fabric. Pen marks, crayon marks, or soft drink stains must be treated promptly with a diluted neutral cleaning solution, tested first on a hidden area.
Vertical blind slats can be removed individually for cleaning according to the supplier’s instructions, but should not be soaked for long periods if the fabric is coated. Curtains need regular vacuuming and should only be washed if the material label allows it; hot steam can shrink the fabric, peel the coating, or distort the folds. After wiping, leave the window coverings open to dry completely before rolling them up again. Keeping a cleaning log for each room helps detect dust buildup, mold at the bottom of the coverings, or damp spots around window sills early.
Daily operation and periodic inspections
Teachers, custodial staff, and room supervisors should receive brief instructions on how to use school window coverings. When operating roller shades, use the handle or cord in a straight vertical direction; do not jerk the bottom rail sideways. When rotating vertical blinds, first tilt the slats open in one direction before drawing them together. Adjust the beaded chain on zebra shades gently, avoiding pulling in both directions at once. If a shade or blind makes a binding noise, moves unevenly, or becomes misaligned at the edges, stop using it and record its location.
Check the expansion anchors, brackets, cord ends, chain connectors, bottom rails, carriers, and the levelness of the window coverings every month. After wet weather or wall repairs, also check for water marks, mold, and the flatness of the mounting surface. Do not apply oil to fabric or plastic mechanisms without instructions, as oil can attract dust and stain the materials. A checklist recording the date, room, issues found, and person responsible for resolving them will help ensure timely maintenance.
To finalize the right configuration, the school should send window diagrams, photos of current conditions, and room usage schedules so the installer can recommend suitable mechanisms. You can request a site survey, light measurements at seating positions, fabric sample testing, and a specification sheet for each area. When you need a cost estimate, request a quote that separately lists fabric, aluminum rails, accessories, installation labor, and additional items. This allows the school window coverings package to be reviewed transparently before ordering.
No block ID is set
No block ID is set
Choosing window coverings for each area: classrooms, preschool rooms, auditoriums, and offices
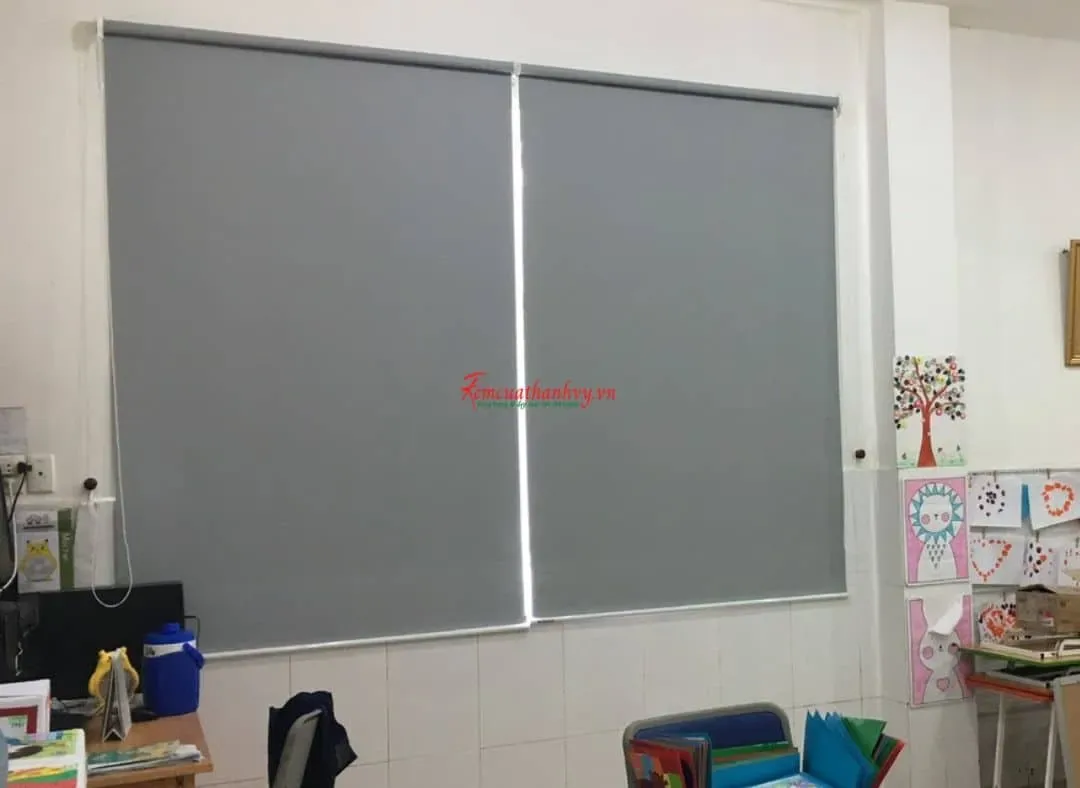
The same style of school window coverings should not be used in every room. Classrooms need light control for reading the board and using projectors; preschool rooms need safe edges, suitable colors, and simple operation; auditoriums need coverage for large windows and a stage backdrop; offices need a neat appearance and privacy. A practical approach is to list each window opening, its sun exposure, frame dimensions, and frequency of use before deciding on a type of window covering.
Classrooms: prioritize glare control and quick operation
For classrooms with whiteboards, projectors, or interactive displays, choose roller shades made of plastic-coated or Acrylic-coated polyester fabric. The shades can roll up close to the top of the window, keep walkways clear, and adjust quickly as lessons change. For wide windows, two or three shades can be installed instead of one oversized panel; this allows teachers to shade the sunlit area without darkening the entire room.
During the site survey, record the width of the glass opening, the height from the windowsill to the ceiling, the handle position, and the clearance needed to open the window separately. If the window frame is approximately 1,2–1,8 m wide, a single roller shade is usually easy to operate; longer openings should be divided into sections according to wall columns or desk positions. Shade edges should sit outside students’ direct line of sight to reduce light shining into their eyes through gaps.
In west-facing rows of rooms, fabric with greater light-blocking capacity can be used for windows exposed to afternoon sun, while north-facing windows can use light-filtering materials to keep rooms adequately lit. A moderately weighted bottom rail helps keep the shade flat when exposed to airflow from fans or air conditioners. The manual control mechanism should be secured at the side, clear of walkways and the first desk in each row.
Preschool rooms: minimize dangling components and choose easy-to-see colors
Children in preschool rooms frequently run, play, and touch objects, so window coverings should have a compact design, wipeable surfaces, and controls positioned out of reach. Roller shades with a cord retainer or a spring mechanism may be more suitable than long hanging cords. Control cords should not hang beside play corners, toy shelves, foam mats, or nap areas.
For colors, classrooms for young children can use light blue, creamy yellow, soft orange, or simple geometric patterns. In rooms with many brightly colored toys, solid-colored window coverings help reduce visual clutter. Animal, plant, or geometric designs should be clearly printed and moderately sized; avoid overly dense details that turn the window into a distraction when the teacher leads activities.
When measuring preschool rooms, pay attention to low windowsills, cabinet corners close to walls, and electrical outlet locations. If window coverings touch the sill or floor, children may pull, crumple, or soil the fabric edges; leave an appropriate gap based on existing conditions. For low glass windows, roller shades can be fitted to cover just the glass, keeping the area below clear so teachers can see the entire room.
In nap areas, fabric with moderate light-blocking capacity helps reduce sunlight while still allowing teachers to recognize the time of day. If using fabric curtains, choose simple pleats, strong stitching, and rods with enclosed end caps. Accessories should not have sharp corners, easily removable small parts, or tassel cords that children can tug on.
Auditoriums: addressing large windows and presentation requirements
Auditoriums often have tall windows, wide expanses of glass, and a range of uses: flag ceremonies, parent meetings, performances, or on-screen presentations. Double-layer curtains are a flexible option when both light filtering and a formal backdrop are needed. The sheer layer reduces diffuse light; the thick fabric layer is used when the stage, projector, or audience area needs to be darker.
For layouts with multiple consecutive glass openings, measure each column bay and determine rod positions before sewing. Powder-coated aluminum rods or load-bearing tracks must be anchored to beams, concrete walls, or verified structures, not merely attached to the decorative ceiling layer. The curtain stacking space on both sides must be calculated to avoid covering speakers, emergency exits, signs, or projection equipment.
Auditoriums with high ceilings should consider a manual pull mechanism with a guide cord, smooth-gliding tracks, or motors if curtains are opened and closed frequently. Whichever mechanism is chosen, operators still need to clearly see the stopping points, pulling direction, and replaceable components. Dark blue, gray, beige, or burgundy often provide a consistent stage backdrop; the actual color should be checked against the walls, seats, and lighting.
Offices, principal’s offices, and teachers’ rooms
Offices need a balance of natural light, privacy, and usable space. Zebra shades allow light-filtering and light-blocking fabric bands to be adjusted at eye level; roller shades are a more compact choice for small windows. If a desk sits close to the glass, choose a model with a roller cassette or a bottom rail that does not protrude, avoiding contact with monitors, files, and chair arms.
Principal’s offices or reception rooms can use single- or double-layer fabric curtains to create a coordinated look with the furnishings. Measure the clearance from filing cabinets, meeting tables, and air conditioners before determining rod positions. Curtains should not cover cabinet doors, obstruct direct airflow, or touch desktops when windows are opened.
Teachers’ rooms often contain multiple desks, computers, and low cabinets. Vertical blinds suit long expanses of glass because the slats can rotate with the direction of sunlight and stack to one side. When selecting slat widths, check the distance between the blind edges and window handles; if opening clearance is limited, dividing the blinds by individual window sash will be easier to use than one continuous span.
After handover, Thanh Vy Curtains stays with you
Talk directly with the Thanh Vy Curtains team to settle the right plan, from design to handover.
Request a quote Call 0985 615 577 Message on ZaloQuick selection table by layout
| Area | Options to consider | Points to measure and check |
|---|---|---|
| Classroom | Acrylic-coated polyester roller shades; divide wide windows into sections | Sun exposure, projector location, window sills, walkways, and the width of each glass panel |
| Preschool room | Compact roller shades, soft colors, safe control mechanisms | Children’s reach, play corners, electrical outlets, cabinets next to windows, and gaps at shade edges |
| Auditorium | Double-layer fabric curtains on tracks or a draw system suited to the load | Ceiling height, column spacing, anchoring beams, speakers, emergency exits, and stage |
| Office | Zebra shades, roller shades, or vertical blinds sized to the glass | Desks, cabinets, air conditioners, window handles, privacy needs, and light direction |
After classification, each room should be assigned a code, such as LH-01 for a classroom, MN-02 for a preschool room, and HT-01 for an auditorium. A code list accompanied by widths, heights, fabric types, colors, operating mechanisms, and photos of existing conditions helps prevent delivery mix-ups when a project spans multiple rows of rooms. It also provides a basis for cross-checking samples, the number of curtain sets, and installation locations in the next implementation step.
The process of surveying, measuring, sewing, and installing school window treatments

The school window treatment implementation process should begin with an on-site survey of each window opening, followed by sample approval, measurements, fabrication according to the schedule, and installation by area. This approach helps minimize discrepancies between rows of rooms, ensures that window treatments cover the intended areas of light, and prevents interference with walkways, desks, chairs, or teaching equipment.
1. Survey the existing conditions in each room
Technicians record the area name, room code, number of window openings, window orientation, sill height, and locations of equipment near the windows. In classrooms with projectors or interactive displays, areas where light falls on the board need to be marked. Preschool rooms also require checks of wall corners, play areas, and locations where children could reach pull cords.
The survey team also checks wall materials, concrete beams, drywall ceilings, aluminum frames, steel frames, or brick walls to select the appropriate screw-fastening method. If a window is next to a cabinet, bookshelf, air conditioner, or electrical system, installation clearances must be clearly recorded on the survey form to prevent the curtain track from hitting anything during operation.
Photos of existing conditions should include wide shots and close-ups: the front view of the window opening, wall edges, electrical outlet locations, utility boxes, window sills, and proposed bracket locations. Linking each photo to a room code helps with cross-checking during fabrication and acceptance, especially for projects with multiple rows of rooms or windows of similar dimensions.
2. Approve samples and the installation plan
After the survey, the contractor prepares a classification table listing window treatment codes, fabric colors, light-blocking levels, operating methods, installation locations, and quantities. The school should approve physical samples rather than relying solely on screen images, because colors vary with natural light and wall paint colors. For school window treatments, samples should be placed beside the window frame to check their suitability.
Installation may be inside the window recess or outside the recess with overlapping coverage. An inside mount creates a neat appearance but requires sufficient depth for the shade housing, brackets, and control handle. An outside mount is suitable when the window recess is uneven, the wall is not flat, or light gaps at the edges need to be covered. Technicians must show the overlap dimensions on each side in the final approved drawing.
For aluminum tracks, the track length, number of mounting brackets, mounting tab locations, and joint positions for large spans must be determined. For roller shades, the control side, roller tube length, bottom rail type, and safe clearance from window handles must be finalized. Any changes after sample approval should be documented to prevent confusion during production.
3. Take measurements at multiple points
Each window opening is measured for width at three positions: top, middle, and bottom; height is also measured on the left, in the center, and on the right. If the measurements differ, technicians record the discrepancy rather than simply taking an average. For window recesses that are not square, a reference edge must be marked, and finished dimensions selected based on operating clearances.
The measurement form should include fields for room code, window opening code, finished width, finished height, mounting type, draw direction, curtain track height, overall coverage dimensions, and notes on obstructions. Roller shade measurements are usually separated into overall dimensions and usable fabric dimensions, because the fabric width may be smaller than the total length of the tube and brackets.
For vertical blinds, the track length and slat height must be measured, and the clearance for slat rotation checked when the blinds are drawn to one side. For fabric curtains, the coverage width, track projection, eyelet or glider positions, and whether the fabric touches the floor or stops above the sill must be determined. These specifications are transferred to the cutting and sewing schedule, not merely noted as symbols on photos.
4. Sew, fabricate, and inspect before delivery
The fabrication workshop issues production orders by room code, avoiding grouping similar window treatment sets into an unlabeled batch. Fabric is checked for color, front and back sides, selvages, and pattern direction before cutting. Coated window treatments must be oriented correctly so that the light-blocking side faces the glass and the finished side faces into the room.
Items to inspect include roller tubes, bottom rails, bead chains, accessory boxes, aluminum tracks, rollers, hanging hooks, eyelets, heading tape, seams, and code labels. Finished sets are checked against the measurement forms for width, height, quantity, and control side. Any creases, misaligned seams, or missing accessories must be addressed before delivery to the school.
Before installation day, materials are packed by room or row of rooms, with a packing list and location diagram. This packing method reduces sorting time on site while lowering the risk of installing a window treatment in the wrong opening of similar dimensions. The school should designate a person to confirm the delivery schedule, transport route, and material staging area.
For further information, please contact Thanh Vy Curtains
We provide free consultation and on-site measuring at your home.
5. Install by area and check operation
The installation team protects floors, desks, chairs, and equipment before drilling. Drilling points are leveled with a spirit level, then anchors, screws, and brackets are secured according to the substrate type. Curtain tracks must be straight, secure, and free of shaking when pulled. For drywall ceilings or surfaces with weak finish layers, attachment points must be secured according to the underlying structure, not merely fastened to the finish layer.
After hanging the window treatments, technicians check the full range of opening, closing, rolling, slat rotation, or sideways drawing. Window treatments must not rub against sills, catch on handles, touch window sashes, or cover fire alarm devices. Control cords must be secured neatly, without excess cord loops within children’s reach. Preschool areas require a recheck of all points that could cause entanglement or impact.
In rooms with projectors, window treatments are tested at different light angles during sunny hours to identify light gaps at the edges and reflections on the board. For auditoriums or wide openings, the installation team tests each track span, joint, and pulling force. If uneven walls or changes to window sashes since the survey are discovered, the adjustments must be documented before completion.
6. Handover documentation and usage schedule
The handover documentation includes a location code list, finished dimensions, installation diagrams, an accessory list, operating instructions, and a confirmation report. School representatives randomly inspect rooms, checking colors, quantities, relative light blockage, and bracket stability. Items requiring adjustment are recorded in a separate list, with a person responsible and a deadline for resolution.
To receive a school window treatment survey plan for each row of rooms, send a list of areas, photos of the window openings, and your preferred installation timeframe. The installation provider will use the actual site layout to prepare a measurement schedule, a window code list, and an installation plan suited to the school’s activities.
Quotes and service commitments to check before ordering school window treatments
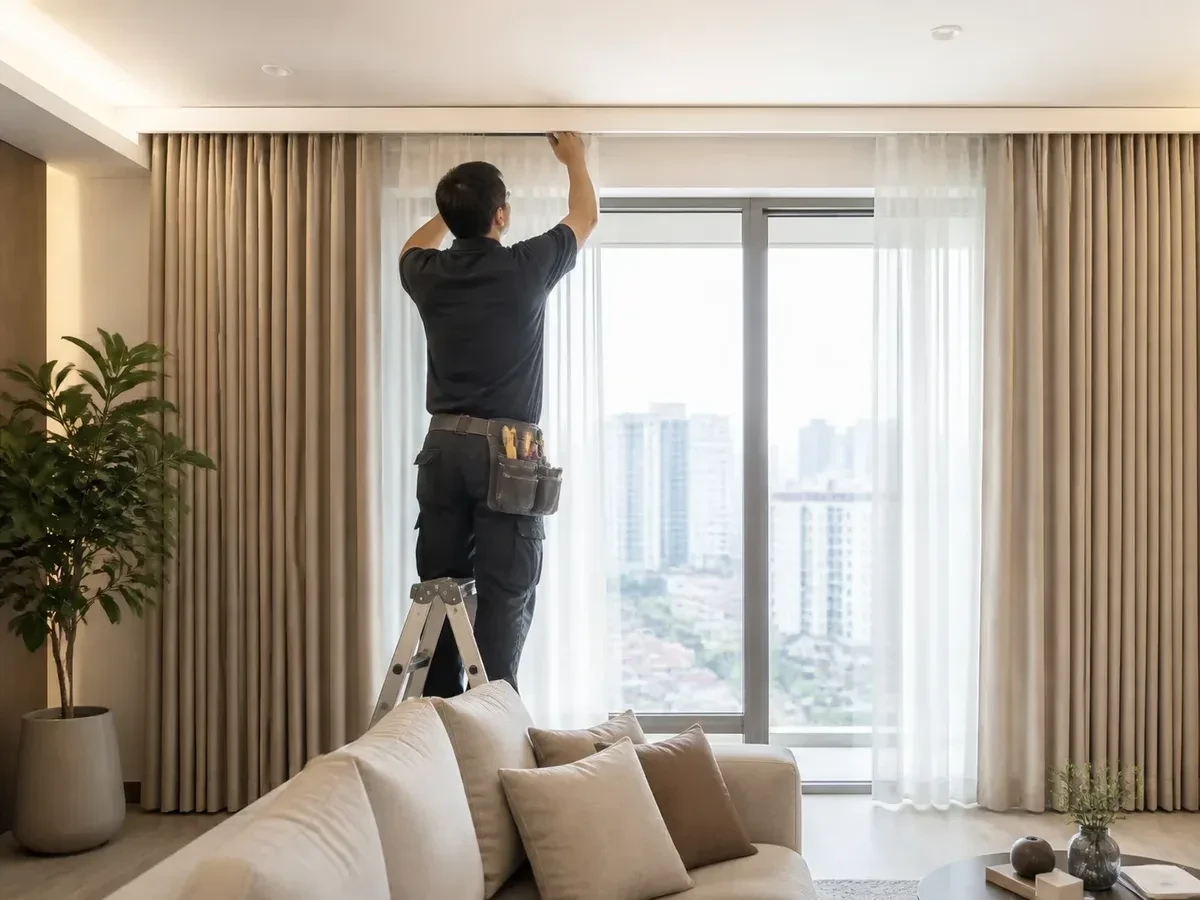
Before ordering school window treatments, the school should request a quote that clearly separates area, material unit prices, accessories, labor, transportation, and taxes, if applicable. A usable quote must come with a window code list, a configuration description, and a completion timeframe, rather than simply stating a total figure.
What line items should the price list include?
Check the quote by area: first-floor classrooms, second-floor classroom rows, preschool rooms, auditoriums, or offices. Each line should state the window code, width, height, number of sets, billable area, and type of window treatment. For roller shades, the fabric width, roller tube, bottom rail, brackets, and pull cord must be clearly specified. For vertical blinds, the price list should specify the slat width, aluminum track, carriers, spacer weights, and control cord. This breakdown helps verify quantities after measurement and avoids double-counting or missing windows.
The materials section must also be specific: 100% polyester fabric, plastic or Acrylic coating, a reference thickness of 0,5 mm, light-blocking level, and selected color. If accessory rails are used, ask whether they are powder-coated aluminum or another type, and whether manual operating accessories, bead chains, roller covers, and expansion anchors are included in the unit price. Do not accept generic descriptions such as “premium window treatments” without fabric samples, color codes, construction photos, or a material confirmation form.
Verify area calculations and additional costs
The school should ask the provider to state the calculation formula: area equals width multiplied by height, whether dimensions are rounded up to a minimum size, and whether measurements cover the outside of the window opening or fit inside it. For example, a window 1,8 m wide and 2,1 m high has a coverage area of 3,78 m²; the quote must state whether billing is based on this figure or a minimum area per set. For auditoriums with many windows, a summary by code is easier to check than a single line stating “all-inclusive package of 20 sets.”
Possible additional charges include removing old window treatments, reinforcing drywall, drilling concrete, using tall ladders, installing outside school hours, transporting materials upstairs, and adjusting dimensions after site acceptance. These charges must be stated in advance in the quote or confirmed as included. If the color, fabric type, quantity, or mounting rail position changes after sample approval, both parties should prepare an amendment rather than rely on a verbal agreement.
Service commitments to check before signing
The contract must include the full scope of work, from site surveys, window measurements, and sample submissions to sewing or fabrication, transportation, installation, and post-installation cleanup. The estimated implementation timeframe is 3–7 days, depending on quantity and site conditions; ask for the start date, handover date for each area, and person responsible to be specified. If classes are still in session, drilling and installation should be scheduled in shifts or by row of rooms to limit noise and dust.
Warranty terms must specify the duration, coverage, and how requests are received. Some market documentation lists product warranties of 12–24 months; when comparing, ask whether the warranty covers the fabric, aluminum tracks, carriers, roller tubes, or only installation defects. Issues such as crooked window treatments, jammed pull cords, loose mounting rails, detached brackets, or incorrect dimensions require specific response and resolution deadlines, not simply a statement of “support as needed.”
Quality commitments should be tied to the approved samples: correct fabric codes, colors, dimensions, pull direction, coverage, and quantities. The installer must hand over measurement forms, a window code list, sample approval records, operating instructions, and an acceptance report. If payments are made in installments, the contract should specify milestones for the deposit, material delivery, installation completion, and the remaining balance after operation has been checked.
Pre-order checklist
- The quote includes unit prices per m² or per set, the area for each window code, and total quantities.
- Materials include names, thicknesses, coatings, color codes, light-blocking levels, and reference samples.
- Accessories include aluminum tracks, roller tubes, bottom rails, carriers, brackets, pull cords, and mounting screws.
- A 3–7 day timeline, an installation schedule by area, and a plan to protect desks, chairs, and equipment.
- A 12–24 month warranty clearly specifies covered components, accepted defects, and resolution times.
- Measurement, sample approval, and acceptance records, along with cleaning instructions, are handed over at the end.
To receive a verifiable price list for school window treatments, send a room list, photos of window openings, preliminary dimensions, and your preferred installation timeframe. After the site survey, ask the provider to return a window code list along with a materials plan, timeline, and warranty terms before the school grants approval.
Acceptance, cleaning, warranty, and maintenance of school window treatment systems
Before signing the handover report, the school needs to check each set of school window treatments in three categories: installation to the correct dimensions, safe operation, and clear after-sales documentation. Acceptance inspections should take place with sufficient natural light, with representatives from the school, the installer, and the person responsible for facilities jointly checking the window code list, fabric types, mounting rails, accessories, and actual quantities.
Know the cost before you decide
Send estimated dimensions and a few photos of the space, and Thanh Vy Curtains will prepare a quote for exactly the items you need.
Request a quote Call 0985 615 577 Message on ZaloAcceptance checklist for each room
- Check room codes, the number of window openings, widths, heights, and opening directions against the approved measurement sheet.
- Inspect the polyester fabric, plastic or acrylic coating, colors, patterns, thickness, and cut edges; do not accept stains, scratches, peeling coatings, or color mismatches between sets.
- Check that powder-coated aluminum tracks, brackets, screws, wall anchors, pull cords, bead chains, control wands, and end caps are securely fastened.
- Test pulling, rolling, rotating slats, or adjusting dual-layer shades for at least three cycles; the window treatments must move smoothly without jamming or slipping down on their own and stop in the correct position.
- Open and close windows, doors, equipment cabinets, and writing boards to ensure the window treatments do not rub against door or window panels or block exits.
- Observe from students’ and teachers’ positions: light should not shine directly into their eyes, onto interactive displays, or onto projectors when the window treatments are in use.
- Photograph each area after acceptance, and clearly record defects, locations, and resolution deadlines in the report rather than confirming them only verbally.
In preschool rooms, also check the height of pull cords and bead chains to avoid creating loops within children’s reach. Brackets must be positioned away from sharp edges, screw heads must not protrude, and operating cords must be secured with suitable cord retainers. For auditoriums or large window openings, test the window treatments simultaneously to detect differences in height, uneven folds, and unusually heavy loads on the mounting rails.
Proper cleaning after handover
During the first week of use, the staff member in charge should use a soft-bristled brush or a vacuum cleaner with a brush attachment to remove dust from the fabric surface, aluminum bars, and roller housing. For plastic- or acrylic-coated roller blinds, wipe with a damp microfiber cloth and a neutral soap solution, then wipe again with clean water and let the blinds air-dry. Do not use bleach, concentrated alcohol, scouring powder, or an iron, or scrub vigorously, as this may cause fading and cracks in the coating.
Vertical blinds should be cleaned one slat at a time, wiping lengthwise without twisting the slats sideways. Fabric curtains should only be removed for washing if the material label and warranty terms permit it; before removal, mark the order of the hanging hooks to ensure the folds are restored correctly when rehanging. Do not spray water directly into the roller housing, motor, controller, or electrical outlet. Areas near writing boards, playground doors, and hallways should be cleaned more frequently because they are prone to chalk dust, dirt, sand, and fingerprints.
Warranty coverage must be set out in specific terms
The handover documentation should include a warranty certificate, a list of curtain and blind sets, the warranty start date, the scope of accessory coverage, and a channel for submitting requests. Warranty periods currently observed in the market range from 12 to 24 months, but schools must refer to the exact period specified in the signed contract. The terms should clearly distinguish between manufacturing defects, installation defects, wear from use, improper cleaning, unauthorized disassembly or repairs, and damage caused by external force.
If blinds become jammed, chains slip, bars bend, fabric coatings peel, or brackets wobble, the manager should not pull forcefully or replace components themselves. Record the room code, the location of the curtain or blind set, the symptoms of the defect, the time it was discovered, and close-up photos, then submit a warranty request. The responsible provider must acknowledge receipt, schedule an inspection, specify a repair or replacement plan, and document the results in a written report.
Maintenance schedule for facilities in continuous use
School curtain and blind systems should be inspected periodically according to usage intensity. Each month, facilities staff should check for dust, pull cords, bead chains, screws, and signs of sagging bars. Each semester, they should test the full operating cycle, retighten screws, adjust brackets, clean tracks, and check clearances around windows. After a long break or whenever the school has repainting or wall drilling work done, construction dust and the condition of the roller housing must be checked again before use resumes.
| Item | Suggested frequency | Person responsible |
|---|---|---|
| Wipe surfaces, vacuum, and check cords | Monthly | Staff member in charge of the room |
| Test operation and tighten hardware | Each semester | Facilities department |
| Adjust alignment and replace worn components | As needed or as specified in the inspection report | Technician |
To receive an acceptance inspection checklist, cleaning schedule, and maintenance plan for facilities in Ho Chi Minh City, schools can submit a room list, photos of window openings, and the approved code chart for an area-by-area review.
Related projects
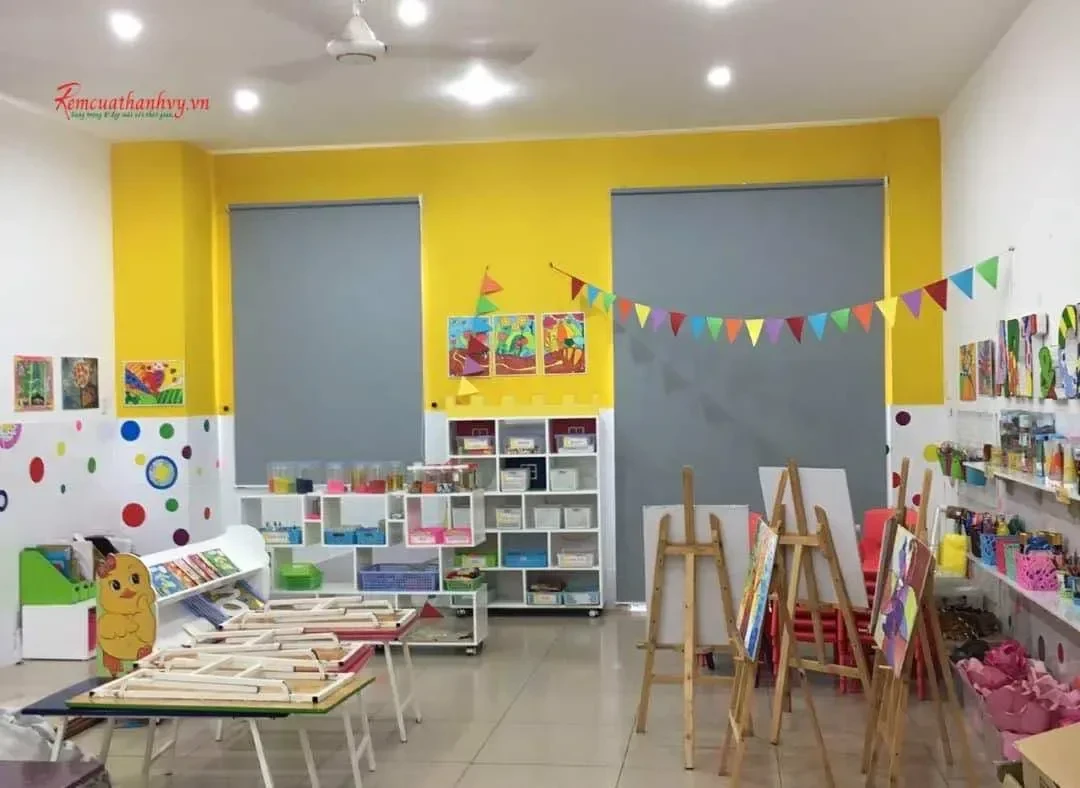
Gray Roller Blinds for a Kindergarten Classroom in Binh Tan District
This project involved installing a roller blind system for a classroom at Little Rose Kindergarten [...]
Unusual Green Roller Blinds for the Little Lion Preschool Classroom – Bình Tân
This project was completed at Little Lion Preschool in Bình Tân District: the installation of [...]
Related services
Curtain Warranty and Maintenance: Checks and Service Under the Policy
A guide to distinguishing curtain warranty service, maintenance, and repairs; preparing records, photos, and videos; [...]
Auditorium and Meeting Room Curtains: Light Control for Presentations and Large Openings
A guide to choosing auditorium curtains for stages, large openings, and glass walls, covering light [...]
Medical Curtains for Hospitals and Clinics in Ho Chi Minh City
Medical curtain services for hospitals and clinics in Ho Chi Minh City, focusing on materials, [...]
Related areas
Curtains in Long Truong Ward, Thu Duc: on-site measurement and installation at your new address
Curtain measurement and installation in Long Truong Ward, Thu Duc. The ward was formed by [...]
Related reviews
Curtains in Thu Duc: 8 Completed Projects and Lessons from Tall Glass Windows
Eight curtain projects we have completed in Thu Duc City share one factor that determines [...]
Related posts

Curtain Price Quotes in District 8: How to Compare Configurations Correctly
A curtain price quote in District 8 is only reliable when you are comparing the [...]
Curtain price quotes in Tan Phu: How to read and compare based on your needs
A curtain price quote in Tan Phu should be read as a complete configuration, not [...]
Binh Duong Curtain Installation: A Streamlined Survey and Installation Process
Binh Duong curtain installation is only effective when the survey, configuration, and mounting location are [...]
Curtain tailoring in Binh Tan: How to choose the right service
This article guides you on how to choose a reputable curtain tailoring service in Binh [...]
Rainbow Blinds for Windows: Tips for Choosing & Styling Well
A guide on choosing window rainbow blinds based on windows, lighting, privacy, materials, finish styles, [...]
Roller Blinds for Windows: Selection & Styling Tips
A guide to choosing window roller blinds based on window type, lighting, privacy, materials, finishing [...]
Roller Blinds in Go Vap: How to Choose the Right Style for Every Window
Only finalize your choice of roller blinds in Go Vap after determining the light filtration [...]

Roller Blinds in Tan Phu: How to Choose the Right One for Every Window
Roller blinds in Tan Phu should be selected based on lighting needs, obstructions, and installation [...]


No comments yet!